“How did that happen?”: Immersive Behaviour and Redstone Construction Tips
Welcome back! This is the last of the introductory posts to my Redstone blog. This blog post will highlight some small tips and tricks to making redstone more accessible to creators and more immersive for players, so that you can jump the learning curve and go to making beautifully simplified giant constructs of your own. It is highly recommended that you read the first two posts in this series:
- Walking Before You Run: A Comprehensive Introduction to Redstone
- Thinking Outside the Blocks: A Guide to Advanced Redstone Components
Learn about basic components and then advanced components before continuing this post.
Space
The importance of spreading your Redstone work is often underestimated.
When starting a new Redstone build, ensure you have a large, flat area to work on, even if you do not currently believe you will need that much space. The reason for this is threefold.
First, working in a flat environment allows you to see very clearly how systems operate if you need to come back and amend the system, thanks to ease of navigation and the ability to locate problems.
Second, There is a great temptation to build Redstone underground so it is out of sight; however, you should resist this temptation, as the visibility of a system is lost underground. This makes amending, adding to, and tracking the circuit much harder.
The third reason for this large flat area is to avoid mixing up multiple circuits. If two or more contraptions have Redstone in the same area, they can easily run into one another and conflict, and you might find you have no space to expand into.
If you are still under the illusion that you will never need to amend your system, you are mistaken! Bugs can occur in even the simplest of contraptions.
Minecraft patches can alsoaffect the way your system works, and more often than not you will develop a better method of making the components of your system as you get better at Redstone. You may find yourself revisiting systems very frequently, and it can have been many days or even weeks since you first built it.
Being able to easily see:
- how it works,
- where it needs to be changed is of paramount importance.
Redstone Visibility
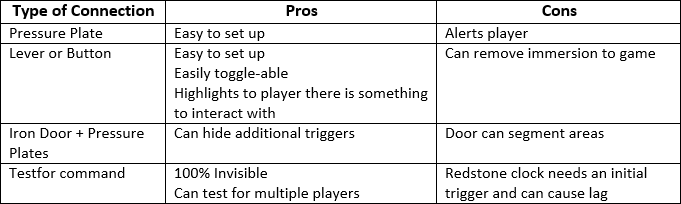
There are many different forms of interaction between a player and a Redstone circuit available to you, each with their own pros and cons. First of all, you have to decide whether you want to use Visible Redstone or Transparent Redstone for your contraption – in other words, whether or not you want the player to knowingly activate a circuit.
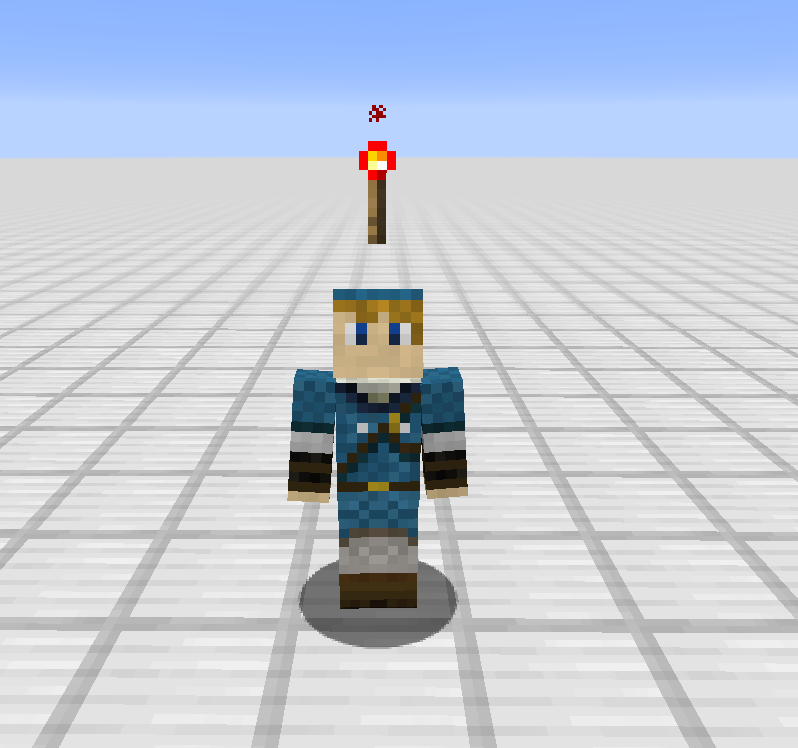
Compare initiating a conversation with an NPC to music starting when a player enters an area. The former is much easier to implement than the latter, relying on buttons, levers or pressure plates near characters to indicate to the player that they need to be pressed or stood on for something to occur.
That said, Visible Redstone sometimes has an impact on immersion. Basic components can be directly connected to your Redstone circuit with ease.
TOP TIP - Wireless Redstone is very helpful when connecting pressure plates and levers to a Redstone system. This will be discussed in my next blog post along with many common command block uses!
Transparent Redstone is slightly harder to pull off. Having pressure plates at the entrance of a new area can disturb some players’ immersion and alert them to an occurrence of some kind.
One workaround for this is the use of iron doors with pressure plates on either side. Players believe the plates are used purely to operate the door, and unbeknownst to them, a secondary action can occur.
This can be combined with permanence to ensure the occurrence only happens the first time the player enters. In The Legend of Zelda: Templars of Hyrule we incorporated the teleports between zones that existed in the original Ocarina of Time game which allowed us to hook up occurrences to entering a zone as the player has to step on a pressure plate to teleport.
The /testfor command (discussed in a later post) is a command that can be activated by a Redstone current to test to see if there is a player (or multiple) in a certain area.
We previously used these commands in conjunction with pressure plates to ensure that all three players were in the same area before an event could occur. These commands can be connected to a Redstone clock to repeatedly check for this. However, this method comes with its flaws.
Redstone clocks can often slow a server down, and players can begin to experience lag based on this consistently updating circuit. One or two might not make a difference, but as your map grows more and more constant checks will occur, leading to lag both server side and client side.
As a partial fix for this, the clock can be activated only as a players enters an area, and then turned off when the action it is required for is completed. This lag-reducing measure ensures that the clock is on for the minimum amount of time, improving your player’s experience.
Immersion Disruptions
Immersion, by definition, is the player’s feel of the game. Some expert Minecraft map makers use this to such an effect that the player forgets they are playing a map in Minecraft, and begin to assume they are in a completely new game world.
Whilst this level of intricacy to game design can be incredibly hard to achieve, a good level of immersion can be obtained by carrying out a few simple steps.
Step 1 - Redstone should NOT be visible unless a player needs to see it. Players that can see how a machine has worked or how it was built ruins the immersion of the game. This reminds the player that they are in a world built by someone, inside Minecraft. Ensure that all Redstone that doesn’t need to be seen, isn’t! (Wireless Redstone may be of great use here!)
Step 2 - Pistons can be very helpful in some components and can often simplify circuits. Avoid using pistons near the player as the noise they create can remind the player of how things are operating. (Where possible, avoid using pistons in favour of piston-less components.) In our maps, we try to only ever use pistons to move blocks the players use. This ensures that the extra ‘behind the scenes’ noise is kept to a minimum.
YouTube Tutorials
There is so much to discuss about YouTube tutorials that I could write a standalone blog post on it, but I will endeavour to be as concise as possible here!
YouTube help can be invaluable to a beginner, intermediate or even expert map designer. With new methods, patches and innovative advanced components being designed all the time, the game is ever-changing.
You, as a Redstone engineer, should not be expected to remember every component and how to construct them. Using YouTube to aid you in constructing or even simplifying a build can be extremely helpful, so do not be afraid to Google commands, components or even concepts to see if people have already attempted or succeeded in doing the same thing! This can save you a lot of time!
Furthermore, don’t be afraid of looking at someone’s build or component and incorporating some of their ideas into you own, tailoring it to your own purposes. This is advisable, as it means you are able to understand the exact functionality of your Redstone so that if, heaven forbid, something should go wrong with the device, you can identify it and quickly correct it.
Using someone else’s entire component without identifying how it works can lead to a lot of lost productivity. If something does go wrong and you do not know how to fix or alter it, you will probably end up wasting more time trying to identify the problem or scouring Google for answers than if you had simply taken the time to learn the Redstone behind the contraption in the first place. This will save you a lot of time in the long run.
On the flip side, remember: credit where credit’s due. This motto is of paramount importance to anyone using YouTube or help sites to aid themselves. Taking someone’s hard earned work without giving them credit for it is NOT in anyone’s best interest.
If you didn’t come up with the idea, don’t claim that you did! It only takes a few seconds to add a sign or line to your credits to acknowledge the source of the components, and this will ensure you stay out of trouble with other members of the Minecraft community.
If an effort to keep things short, I am going to conclude this blog post here. In my next few posts, I will be addressing how to use command blocks and how to implementing NPCs. Stay tuned for the next instalment!
Until then,
Happy Adventuring
