Thinking Outside the Blocks: A Guide to Advanced Redstone Components
The following post discusses some of the more complex components that we have used to build our maps. These contraptions are all comprised of the basic components discussed in my first post - Walking Before You Run: A Comprehensive Introduction to Redstone. We highly recommend you make your familiar with these basic concepts before continuing.
Logic Gates
A logic gate is a component that performs a particular function based on two inputs. This function differs depending on the logic gate you choose to make. They come in three primary types:
AND Gates
AND gates will only output a positive signal if both of the inputs are on. This is great for map makers as it is a very simple tool to allow multiple objectives to be achieved before something occurs. Here is the design for a very simple AND gate, and one example.
The example here is a button and pressure plate. Here, the player must stand on the pressure plate and press the button for the door to open. If only one of these actions is performed, the door remains closed. If you require more than two events to be triggered before the output is activated, see this set-up below:
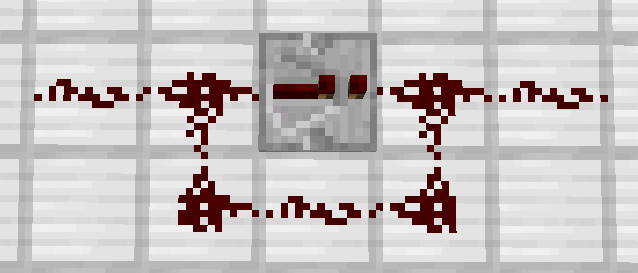
This system connects four inputs to one output. Only when all four inputs are on, will the output be activated. This can be extended to almost any number of inputs – just ensure that each current extends far enough that it still reaches your output redstone torch without interference from the other inputs.
OR Gates
OR gates will only output a signal when at least one of the inputs in on. In the following example, these two levers are connected to a door. They can both open the door; however, in order for the door to close, both levers must be turned off.
These can be used to allow two inputs to activate the same circuit. Remember that both inputs need to be off for the circuit to turn off.
XOR Gates
An XOR gate is very similar to an OR gate, but with one slight change: the system outputs a current when only one of the inputs is active. When both signals are active, the output is off; similarly, when both signals are off, the output is off.
This can be very useful to create systems like multiple switches to toggle one system, such as a light system. Here, when either switch is toggled, the light will turn on or off. This means the system can be controlled from either switch independently.
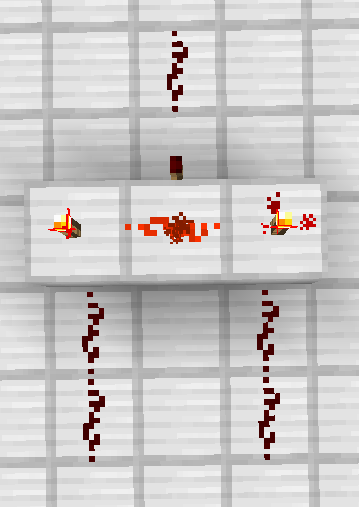
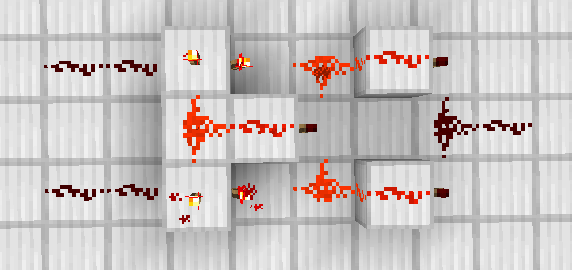
This system can be extended to multiple inputs, but it is more complex to implement than a simple AND gate. If, for example, you have three inputs, connect input one and input two to an XOR, then connect the output of that and input three to a second XOR system. This can be repeated until all the required inputs are connected.
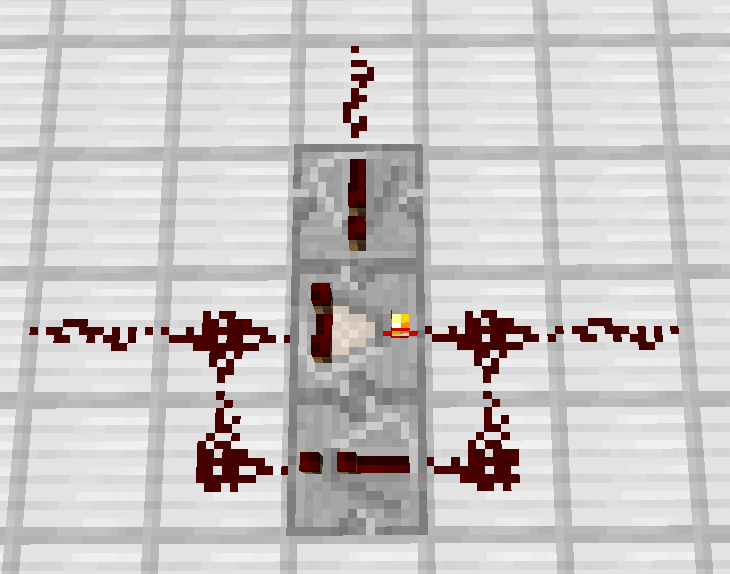
 An XOR gate with three inputs
Whilst the AND and XOR gates come in handy very often, the OR seems to pale in comparison, as does its complexity!
Pulse Generators
Redstone generated signals come in two main forms: pulse and constant. Whilst components like switches and pressure plates generate a constant output until released, buttons provide a pulse. A pulse from a button, however, does not last for a specific length of time – instead it is randomly assigned a duration by the game. A pulse generator will take any kind of input current and output a single redstone pulse of a length you can choose. This is very useful for creating multiple occurrence systems that do different things each time you activate them.
A simple pulse generator can be made using a piston or a redstone comparator.
 Note: The piston is connected to a repeater with a two tick delay
Either of these systems can be edited to create a longer pulse, simply by increasing the delay on the repeater into the piston for the first variant, or increasing the delay on either (or both) of the repeaters on the piston-less model.
These systems can be combined with permanence in order to create multiple occurrence systems that are often used for complex machines and NPCs.
Permanence
Permanence simply means that once the circuit is activated, it remains activated. Two common uses of permanence include keeping a door open after achieving an objective, and triggering one-off events like speech or summoning enemies.
Permanence is created very simply using the system shown below:
This creates a permanent circuit when powered, as the repeater powers itself through the loop after being initially activated.
Permanence can be fitted with a canceller. This allows a separate circuit to cancel the permanence, turning off the circuit. Once the cancelling circuit is de-powered, the permanence circuit can be reactivated the same way it was originally.
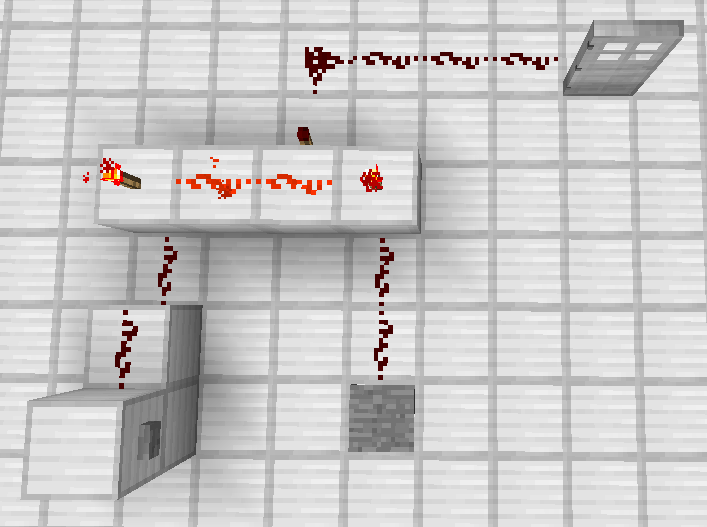
A good example of this use is a circuit that opens a door for a period of time before closing itself (cancelling the permanence). To fit a permanence with a canceller see the image below:
Note that the repeater and comparator face opposite directions, and the device is orientated so that the comparator faces towards where the current is heading, and the repeater back towards the source.
The cancelling circuit in the image above comes in from the top. The source of the permanence circuit would be placed to the left, with the component that it will power to the right. Cancellers can be used to reset one-off events.
Let’s take a boss fight for example. Several things may happen at the beginning of the boss fight, such as introductory speech or the first wave of enemies spawning; however, you do not want the speech to occur again during the fight, so the permanence prevents that circuit from being retriggered. If all players die, a canceller can remove the permanence, thus allowing the boss to be restarted including the intro.
Pulse Lengtheners
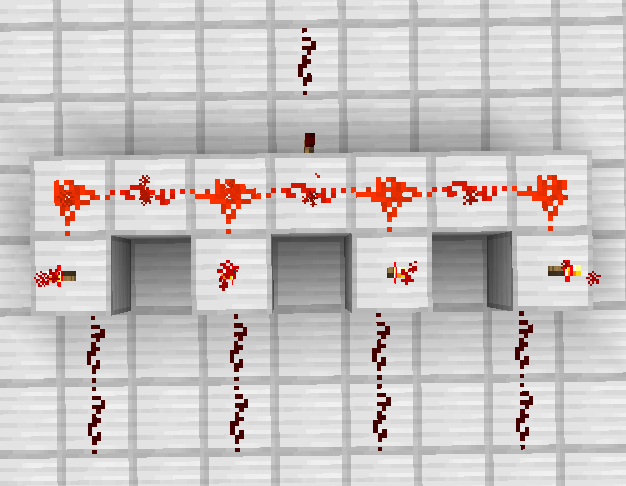
Similar to a pulse generator, a pulse lengthener is used to turn a short redstone signal into a longer pulse. An example set-up of a pulse lengthener is as follows:
 Note: More of the repeating unit can be placed in the middle to elongate the duration of the pulse. (If your redstone pulse exceeds 15 pieces of redstone, remember to place a repeater on the redstone wire alongside the blocks, in line with the repeater, every 15 blocks.)
In the example above, when the source is attached to a pulse generator, the output will extinguish after 1.6 seconds. This can be exceptionally helpful in creating timers. For example, when a button is pressed a door may open, and the player must get to the door before a set amount of time passes and it closes again.
The advantage to using a pulse lengthener over a permanence with a canceller here, is that the player can restart the timer by simply pressing the button again.
T-Flip Flop Components
Ever wanted to turn a button into a lever? You need a T-flip flop (T-FF) component. Just as it says on the tin, every time this component recieves a redstone signal, it alternates its output. This can be very useful in having a button that activates, then deactivates a system. In Templars of Hyrule, this was the only way we could create the Hyrule Castle Garden Puzzle in the past, as well as the changing orientation of rooms in the Forest Temple!
Two main types of T-FFs exist, much like pulse generators: pistoned and piston-less. Find both below!
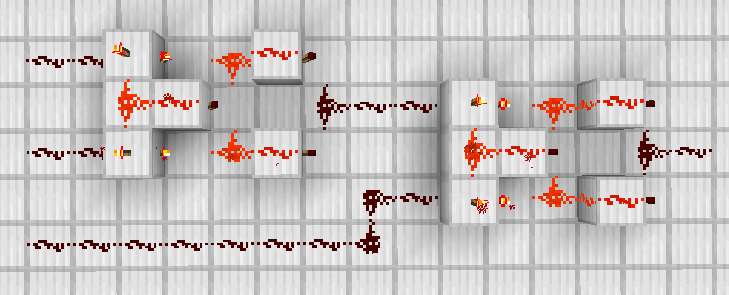
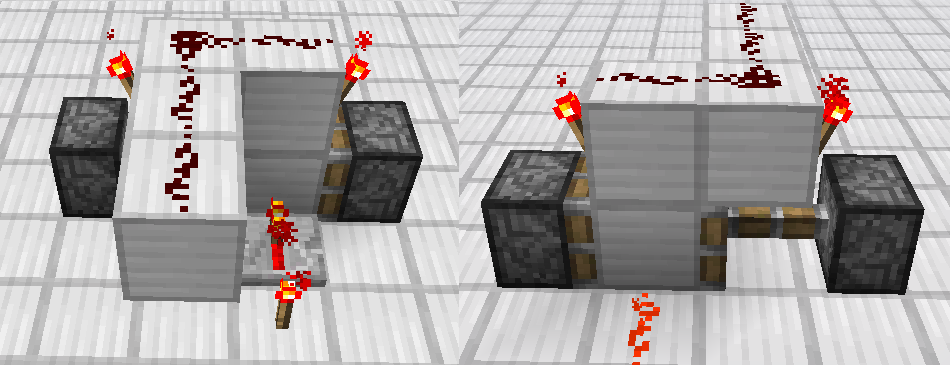 The front and back of the pistoned T-FF. The input for the pistoned T-FF is the wiring on top of the pistons (shown left), and the output is on the floor level (shown right).
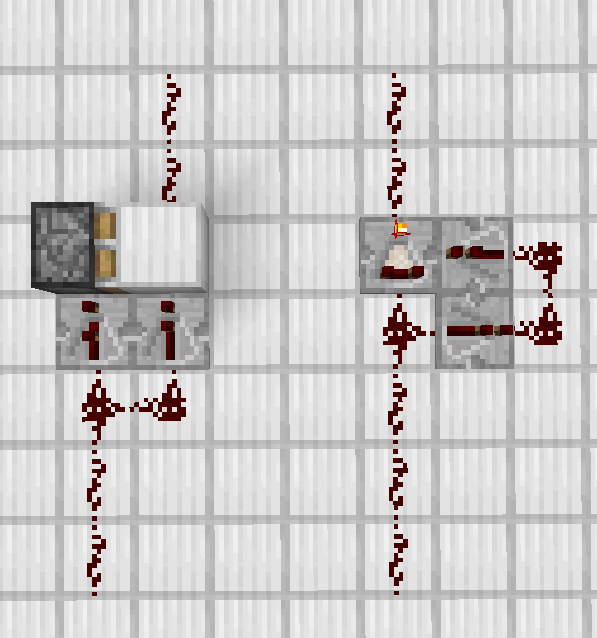
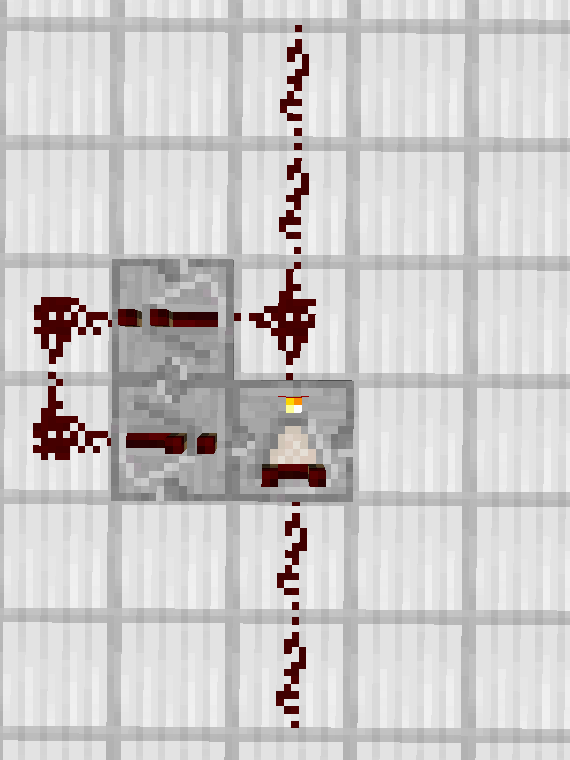
 The piston-less T-FF. Note that the redstone repeator coming out of the raised block is on a four tick delay.
Bear in mind that the piston-less T-FF is less memory intensive for server RAM. This is because, since it contains no moving parts, it neither makes a sound nor alerts the server when moving the block.
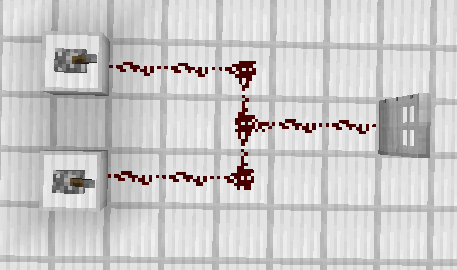
Redstone Clocks
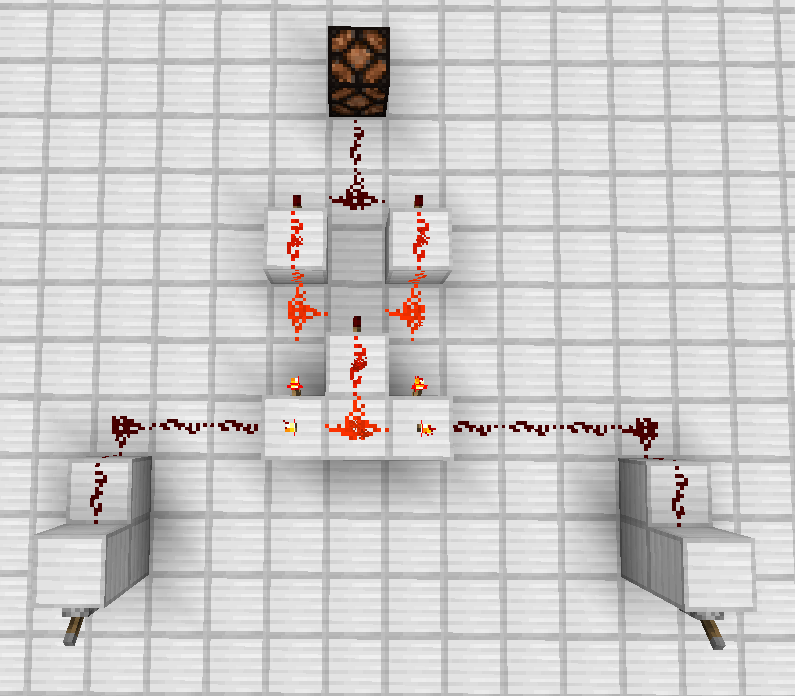
A redstone clock is a system that rapidly acivates and deactivates continuously. It has many advantages in map making, although it has a few downfalls too. This is what a simply alternating clock looks like:
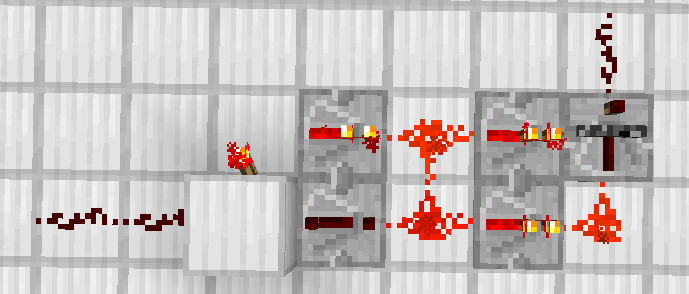
The redstone current goes though the comparator, then powers the canceller. The comparator stops sending a signal, the canceller stops receiving a signal, and the cancelling system stops. Then the cycle starts again. Below is a more complicated example of the application of redstone clocks in mechanisms:
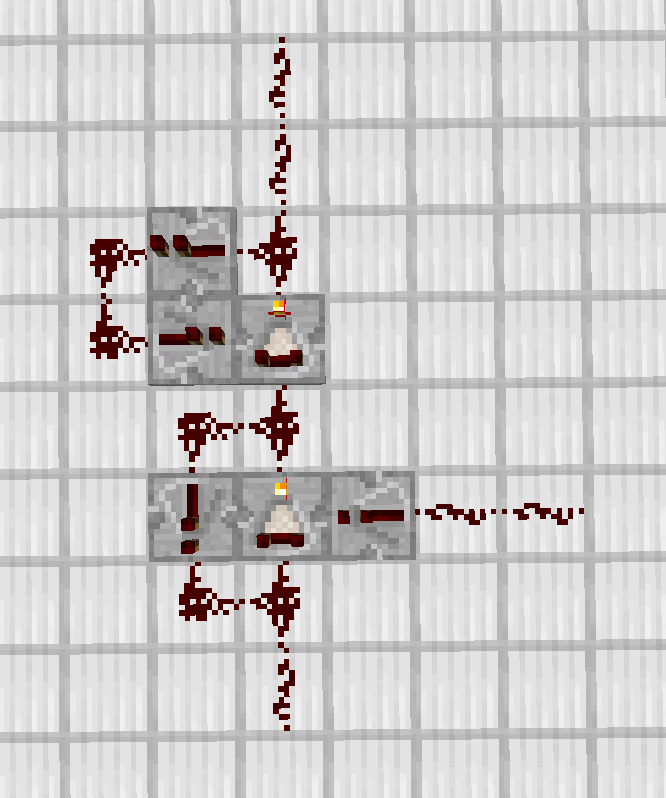
This is a redstone clock with a pulse generator which is fitted with a cancelling system. When a signal comes in from the bottom, it will remain permanently activated, sending a pulse into the clock. The clock will then send out an alternating current that rapidly turns on and off.
The input signal from the right is the cancelling system which cuts the permanence and stops the clock from functioning. The advantage of having a cancelling system is to de-activate a system after you have finished using it. This way, given it is not constantly pulsing, it won’t slow a server down.
This concludes my blog on advanced components. With this knowledge under your belt, you are about ready to start making you own large components!
Next up: “How did that happen?”: Immersive Behaviour and Redstone Construction Tips.
