“/help!” – A Basic Introduction to Command Blocks

In this blog post I will be providing map makers with a basic knowledge of command blocks to help turn their ideas into reality. Command blocks have enormous potential (especially after their 1.9 update), since they provide a lot of functionality that other redstone components, such as pistons and doors, could not even dream of achieving! I’m here to break down their uses in an easy to understand way.
How do I get a command block?
Command blocks are not offered on the standard creative mode screen so in order to get one simply type the following into your chat;
/give @p command_block(The give command will be explained later in the post, so for now, just copy and paste the command to receive your first command block.)
All commands listed here can be executed by players by using the chat console, but will also work when placed inside command blocks. The advantage of using command blocks is that you can hook them up to redstone to work consistently for all players without the need to type commands out all the time.
How do I use command blocks?
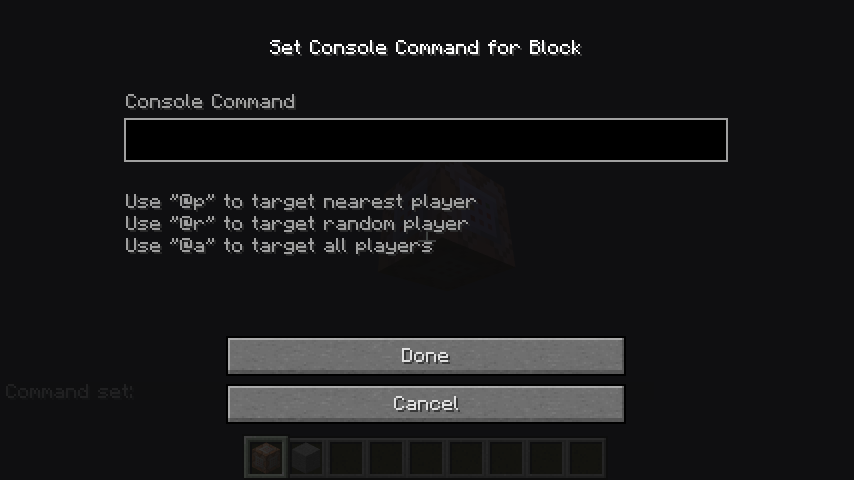
After you have placed the block, you can right click on it to open the command screen. This allows you to enter the command you wish to activate with the block and when you select ‘Done’ the command is saved inside the block.
As discussed in previous redstone posts, a command block needs to receive a redstone signal to activate the command it contains. Thanks to this, complex redstone set-ups can be achieved in game: for example, commands can be looped on a clock (mentioned in detail here) or linked to events such as button presses.
Teleporting
The teleport command is a good one to start with. This command allows you to teleport a player to another location or player. The command code for this is;
/tp [person to be teleported] [place to be teleported to]For example, to teleport a player with the name “Batman” to a set location (say, the Batcave) with coordinates: x=100, y=64, z=120, you would enter;
/tp Batman 100 64 120You can swap the coordinates out for another player if you wish. For example, if you want to teleport Batman to a player called “Robin” you would simply enter;
/tp Batman RobinTarget Selectors
Whilst these commands are very useful when playing with players whose names you know, it does not provide any utility if you wish to perform the action to a player you may not know, for example a random player who has downloaded your map to play.
This is where target selectors have their use. They allow you to select a player based on certain parameters, such as their location. There are 4 commands to choose from:
@a @p @r @e
This can be substituted for the player name in the command and will have an effect based on the selected target selector.
@a – This means ‘all players’ and will operate the command to all active players on the server.
@p – This means ‘nearest player’ and will operate the command to the person closest to the location the command is activated from (the command block)
@r – This means ‘random player’ and will operate the command for a randomly selected player online.
@e – This means ‘entity’ and will target all entities for the command.
[Note: Entities are players, mobs, neutral creatures and non-block items like armour stands. A comprehensive list of entities can be found here.]
Using these in an example, I can choose to teleport the nearest player to the Batcave [100,64,120] by typing;
/tp @p 100 64 120Or teleport all players to the closest player with the command;
/tp @a @pIn addition to using coordinates, you can teleport players relative to where they currently are; to do this, instead of quoting coordinates x y z, you use ~x ~y ~z which will teleport players by that many blocks from where they currently are. This can be useful as you can to move all players by a certain number of blocks, but maintain their distance from one another. For example;
/tp @a ~0 ~10 ~0This teleports all players 0 blocks in the x and z direction from where they are and 10 blocks in the y direction. This would make all players fly 10 blocks into the air from where they are currently standing.
Note: that relative coordinates and actual coordinates can be used together like so;
/tp @p 100 ~0 120This teleports the nearest player to x=100 and z=120, but their y coordinate remains unchanged.
Advanced Target Selectors
Target selectors can get much more complicated, however if you are just about happy with the above selectors then you need not read this section as it can be very confusing!
Advanced target selectors follow the @a,@p,@r,@e command and stipulate a further requirement for the activation. These allow you to set boundaries and conditions that must be met for the selector. From here on these will be referred to as ‘arguments’. The arguments follow the selector and are contained within square brackets, each separated by a comma. For example, if you wanted a command that teleports all players within a certain region you could use the radius argument. Here is an example;
/tp @a[r=10]Batman
This teleports all players within 10 blocks of where the command was activated to a player called Batman. This can be further controlled if you would like the centre of the radius to be a set location by using the x,y,z arguments. For instance;
/tp @a[x=100,y=64,z=120,r=10] Batman
This command selects all players within 10 blocks of the coordinates 100,64,120 (the previously discussed Batcave) and teleports them to the player called Batman.
There are more arguments to select from, but a summary table of the most commonly used ones is as follows;
| Command | Description |
|---|---|
| x, y, z | coordinate |
| r, rm | radius (max, min) |
| m | game mode |
| c | count |
| l, lm | experience level (max, min) |
| score_name_ | max score |
| score_name_min | min score |
| team | team name |
| name | entity name |
| dx, dy, dz | volume dimensions |
| rx, rxm | vertical rotation (max, min) |
| ry, rym | horizontal rotation (max, min) |
| type | entity type |
This can be used in multiple combinations and allow the map maker to select specific players based on multiple different requirements. A huge advantage of this is its integration with scoreboards which will be discussed in a later post, so keep your eyes peeled!
Entity types are always written with a capital letter to start and can be specified to any argument present on the list above. Note that there is an additional syntax you can use alongside the type command, and this allows you to specify entity types NOT to be selected. To do this, add an ‘!’ before the type to indicate that you do not want that type to be selected. For example;
/tp @e[type=Villager] ~0 ~10 ~0This will teleport all Villagers to blocks into the air, however by using an ‘!’ like so;
/tp @e[type=!Villager] ~0 ~10 ~0You can teleport all entities that are NOT Villagers 10 blocks into the air.
Common Commands
Now that we can select characters based on set requirements, it might be a good time to introduce you to some commands that you can operate with these selectors and arguments!
Just like players, you can create command blocks that talk by using the commands;
/say

/tell

/me
Each of these commands have a different use and a different set of clauses to follow! The simplest of these is the /say command;
/say [TEXT]or for example;
/say Get out of my Batcave you Joker!This command tells to server to produce some text and inform all of the players on the server of the text. By default, this will appear to be said by a ‘player’ called @.
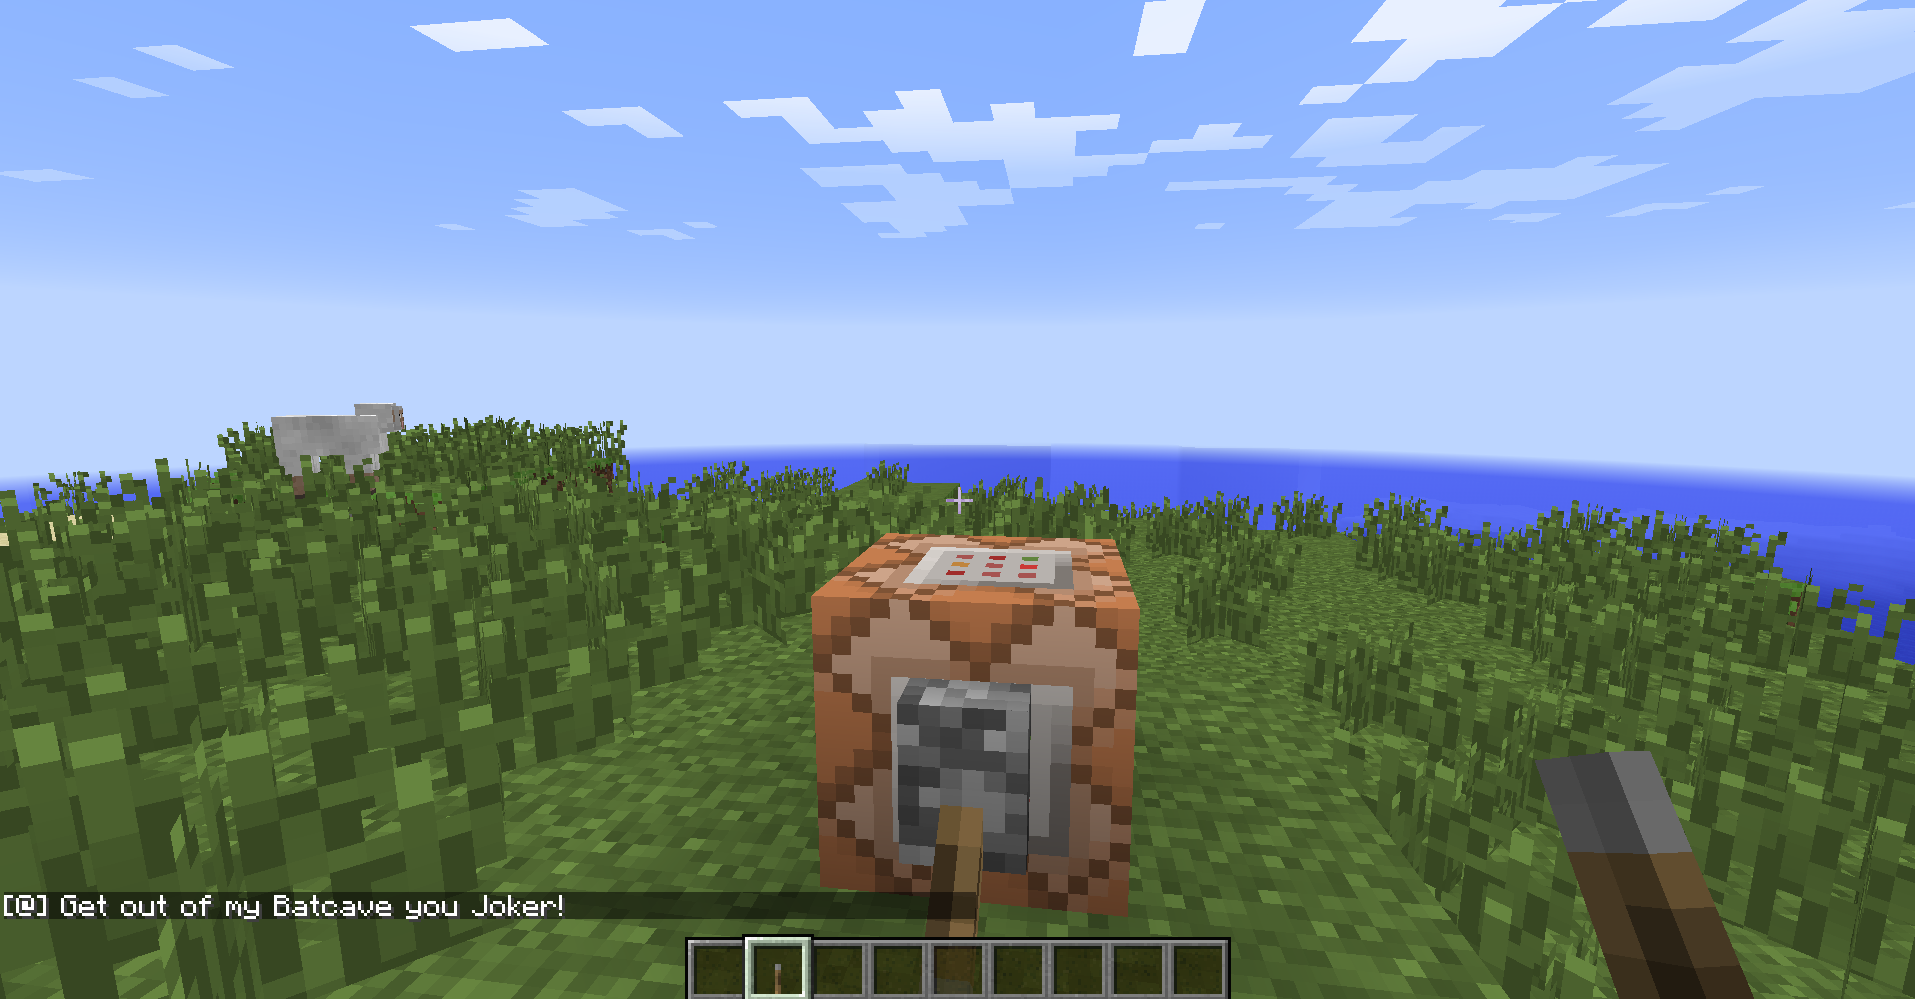
However, by renaming the command block using an anvil, you can ‘create’ characters of your own!
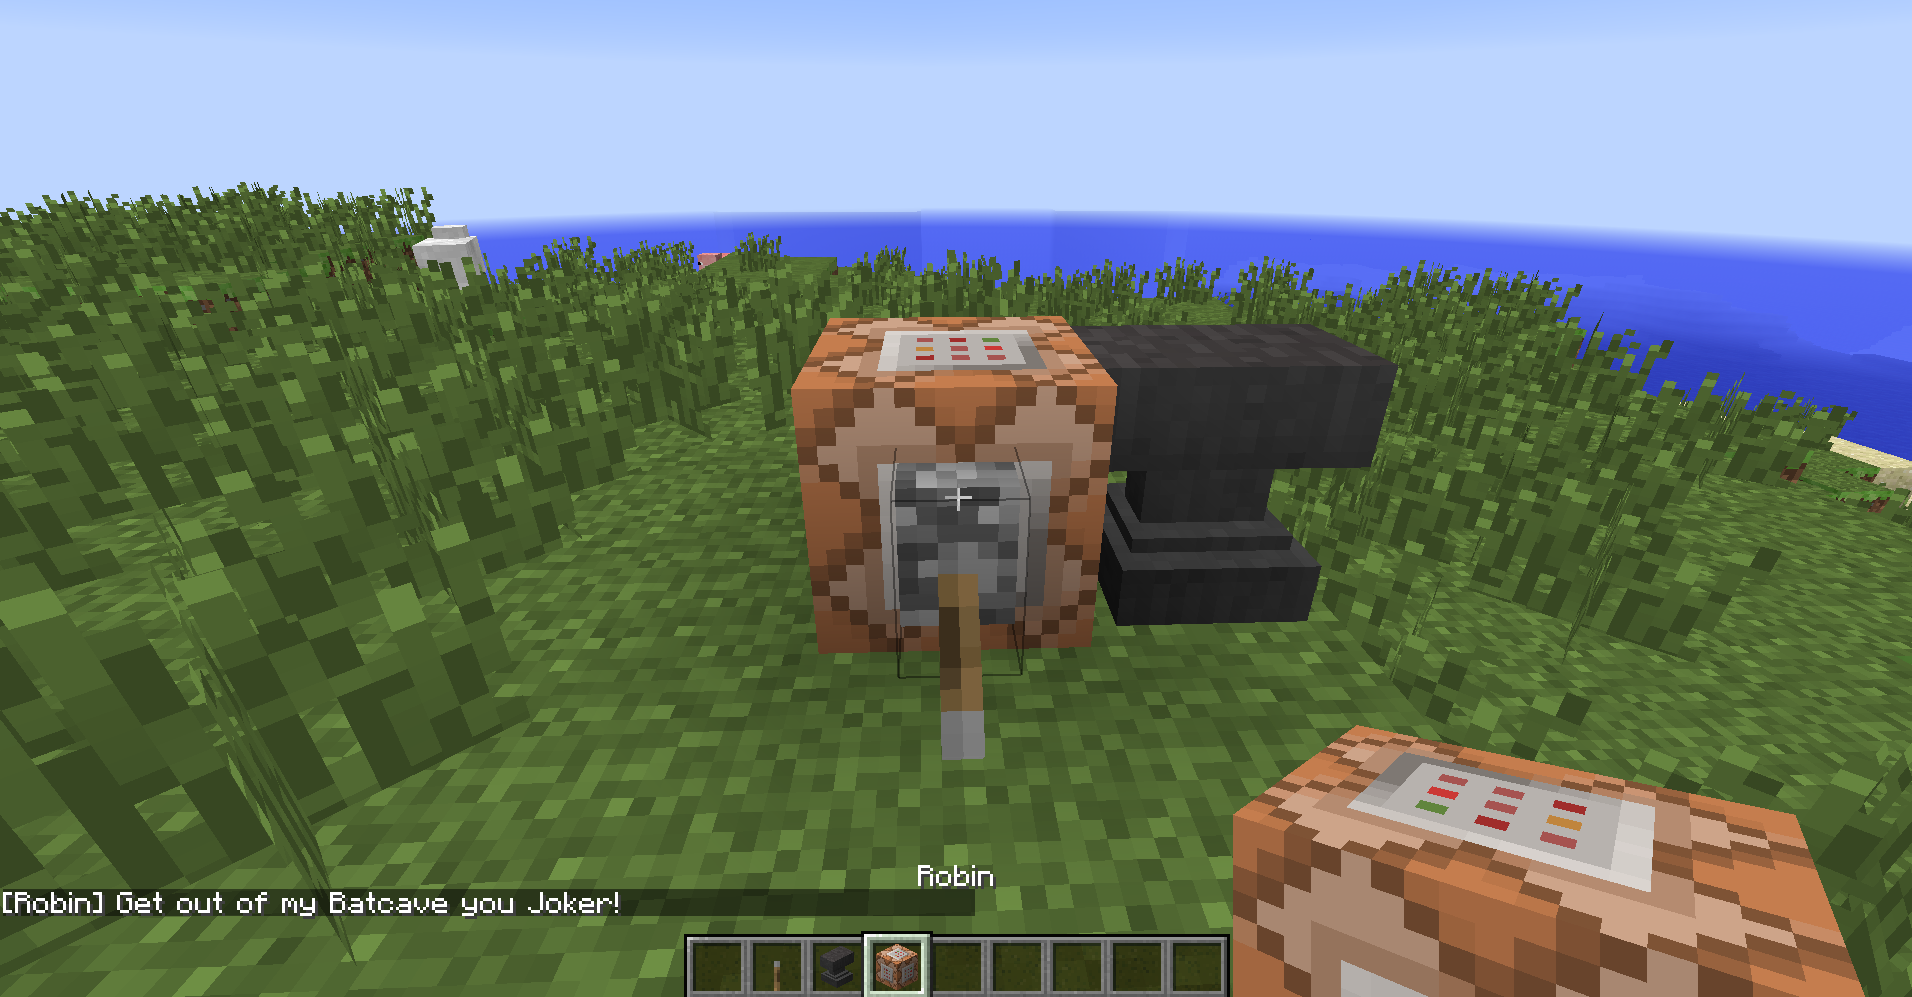
This is exactly the same command on the inside; it is simply a command block that has been renamed ‘Robin’ by an anvil. [Although I am not sure why Robin thinks he owns the Batcave…]
/tell allows you to select a player that will receive the message, these can be used with either player-names, or target selectors with or without arguments. For example;
/tell [player] [Text]Or to inform the player called ‘Robin’ that the Batcave isn’t his;
/tell Robin This is my Batcave, stop claiming it as your own.The /me command works the same as the say command but the name does not appear in square brackets, instead it appears after an asterisk with the text immediately following. This could be used for displaying emotion, illustrating visual events or creating custom text starters.
/me exits the batcave. \*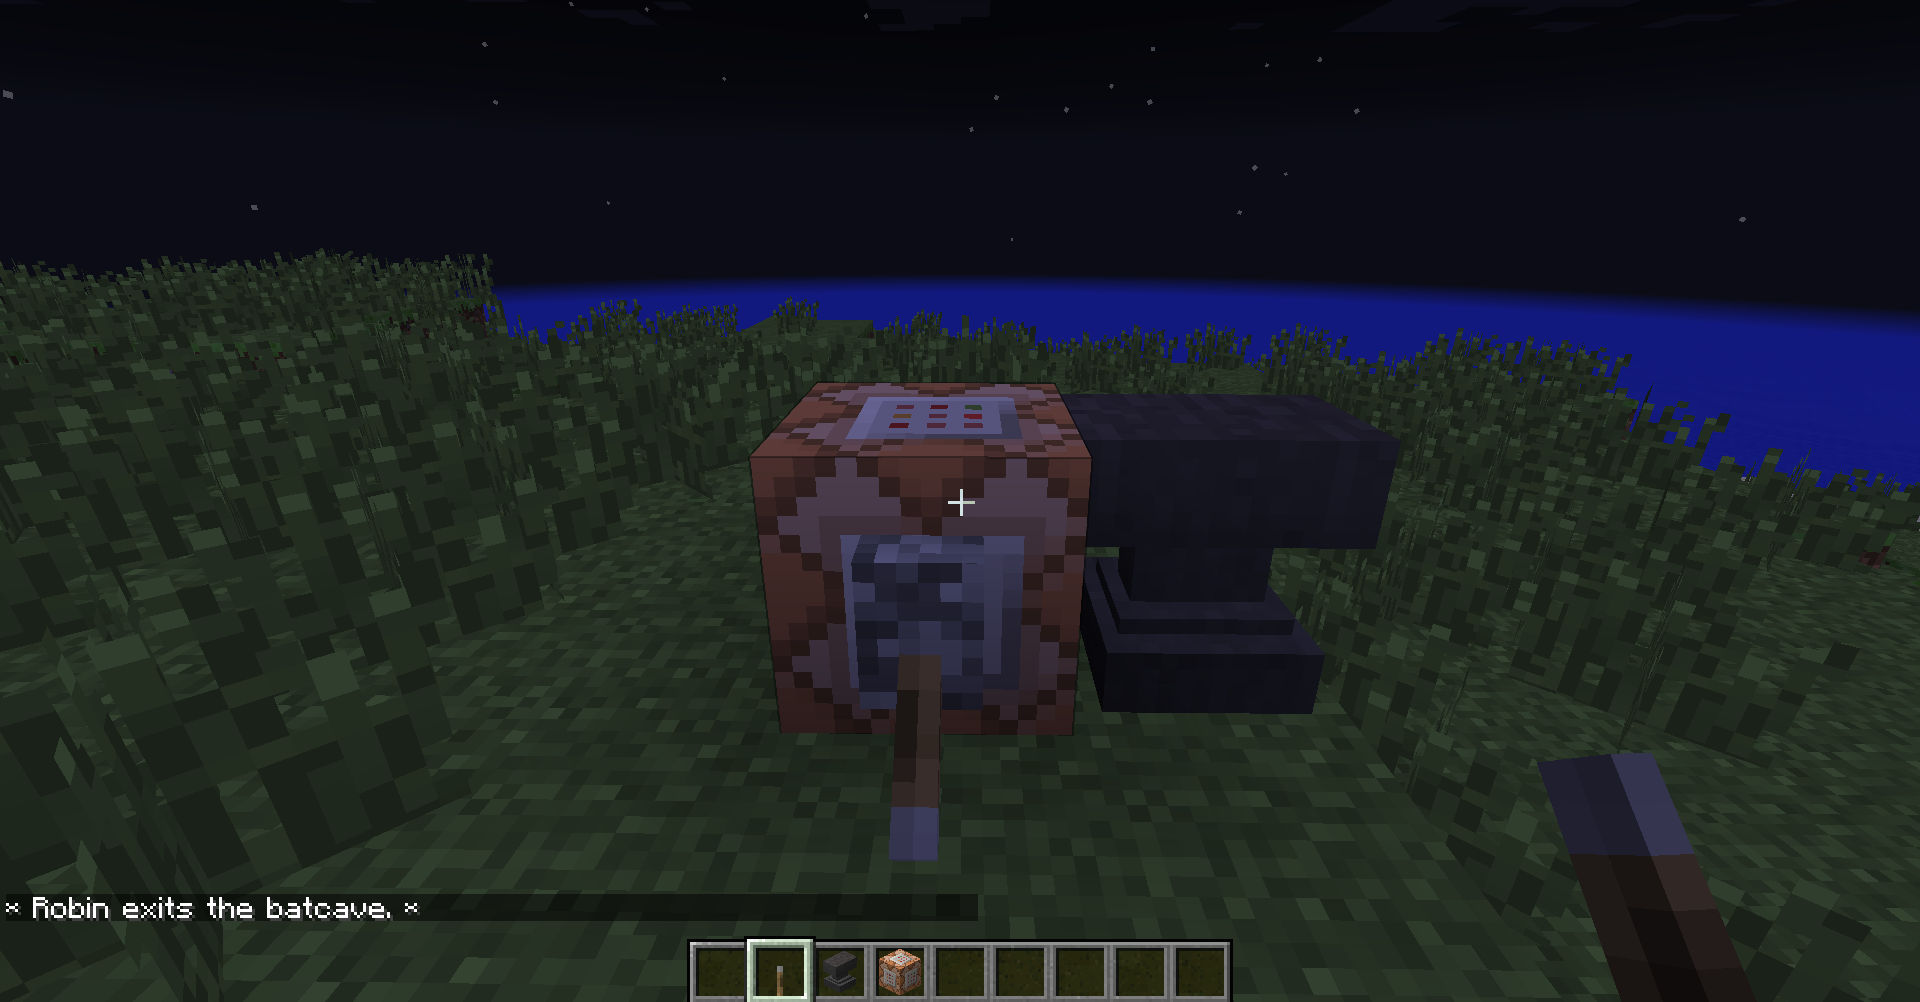
Another useful command for beginner map makers is the ability to control both the weather and the time. These very easy commands give you control over just that.
/weather [type] {time}
Where the type is one of the following; clear, rain or thunder.
The time command I have placed in curly brackets, indicating that it is an optional argument. If you fail to enter anything in that space than a random amount of time will be selected, but if you want the weather to rain for at least 30 seconds you can type;
/weather rain 30The time commands are very similar and as easy to use;
/time set [value]

/time add [value]
Where the value is typically between 0 and 24000; either setting the time to that value, or adding that amount onto the time.
The final introductory command is the /give command. This allows you to provide a player with a specific item. It takes the form of;
/give [player] [item] {number} {data} {{dataTag}}- The player can be either a name or a target selector with or without arguments.
- The item is the name of the item, if you are unsure you can type the start and press tab to attempt to autocomplete the word. (The game will accept either minecraft:name or just name)
- The number is the quantity of that item you wish to give to the player.
- The data is used to indicate which type of that block you wish to give. This only has an effect for blocks like stained glass, wool and items with multiple colours or types. (The default is 0.)
- The dataTag indicates any additional information to add to the item, such as a name or a lore. It must be surrounded by curly brackets.
For example if you want to give all players four pieces of stone;
/give @a stone 4/give @a minecraft:stone 4And if you wanted to give a random player 16 pieces of orange wool (wool with a data value of 1)
/give @r wool 16 1/give @r minecraft:wool 16 1And finally, if you wanted to give the nearest player to the coordinates 100,64,120 a stone sword with the name ‘Kokiri Sword’ you could enter the command;
/give @p[x=100,y=64,z=120] stone_sword 1 0 \{display:\{Name:Kokiri Sword\}\}There are lots of dataTags to play around with, and Gamepedia’s comprehensive table shows you how to use each one.
That concludes this blog post on an introduction to command block basics. There will be a few more blog posts with more advanced commands coming in the near future, and then following those, I aim to start showing you how to insert particular mechanics that are common to many games into your own Minecraft maps! I hope you found this helpful and as easy as I had hoped I could make it!
Until then,
Happy Adventuring
